Rene Munoz Plastering LLC

532 Heiser Rd, Collegeville, PA, 19426

GET A QUOTE

Edit Template

COME HOME TO QUALITY

Start Your Home Repairs, Let's go Today!

Stucco contractor, certified 3 coat stucco company, professional stucco installation & repair in PA

We proudly serve Chester County, PA Bucks County, PA Delaware County, PA Montgomery County, PA

Professional stucco 3 coat repairs and installations

Quality drainable & breathable “STUCCO 3 COAT SYSTEM” is a traditional stucco application consisting of a scratch coat (first coat), a brown coat (second coat), and a finish or color coat (third coat). The scratch coat serves as a durable base, embedded in metal lath mesh to minimize the risk of cracking. After curing, we apply  the brown coat, which is the base for the final coat. The finish coat can consist of either a cementitious or acrylic base stucco, and is available in a wide range of textures and colors. Feel free to visit our resources  page for a stucco and James Hardie Fiber Cement siding  color chart.

It is important to note that stucco is porous, allowing for greater moisture retention than vinyl or fiber cement siding. We understand that contemporary practices may not be suitable for older buildings. With our extensive expertise in 3 coat stucco systems, we work with high-quality brands and materials to guarantee longevity, functionality, aesthetics, and protection for your investments.

If you are in need of a professional contractor, looking for help with stucco remediation, siding, painting, stone or basement waterproofing, feel free to contact us, or contact Jonathan directly. We are happy to help and answer your questions.

beautiful, stucco 3 coats installation in a tan stucco color finish

Professional Stucco 3 Coats Repair and Installation in PA

1.-WOODEN SURFACE

On wooden walls sheathing should be installed  continuously, positioning the boards horizontally. Home owner, framer and/or builder should leave a 1/8” space between the edges of the boards to allow for moisture expansion. Make sure wood sheathing is the proper moisture content and grade in order to prevent unnecessary cracking.

2.-DRAINAGE PLANE

This  will  be  a  layer  of  water  resistant barrier that will cover completely  the home exterior, this  layer  is  most  common on  new construction  it  will  prevent the  intrusion  of water, air and  moisture  while  the residence is been  build. This layer should  be installed in a shingle way mode  starting from  the bottom  to  top using only  manufacturer recommended  fasteners (3/8” galvanized), this first  layer should  be installed  approximately  5” below the sill plate for further protection of the joint between  the basement’s  concrete  and  the framing structure.

3.-WINDOW FLASHING TAPE

Flashing tape is an essential part of the construction and protection of your property, its aggressive adhesive forms a permanent bond between the window flange and  the building substrate, it also self seal around nails, screws and staples used to secure housewraps and building papers. Specially designed flexible flashing  like Dupont’s flex  wrap should be install over an arch window and ALWAYS at the window’s sill as part of a proper window waterproofing and installation, at the bottom  flange YOU SHOULD NOT install a self adhesive flashing over the window flange this will not allow the window to properly dry out and drain , for  better  result is  convenient to use  a  flashing  bigger  than  4” wide to assure  better  bondage  between flanges  and  building substrate.

4.-WATER RESISTANT BARRIER

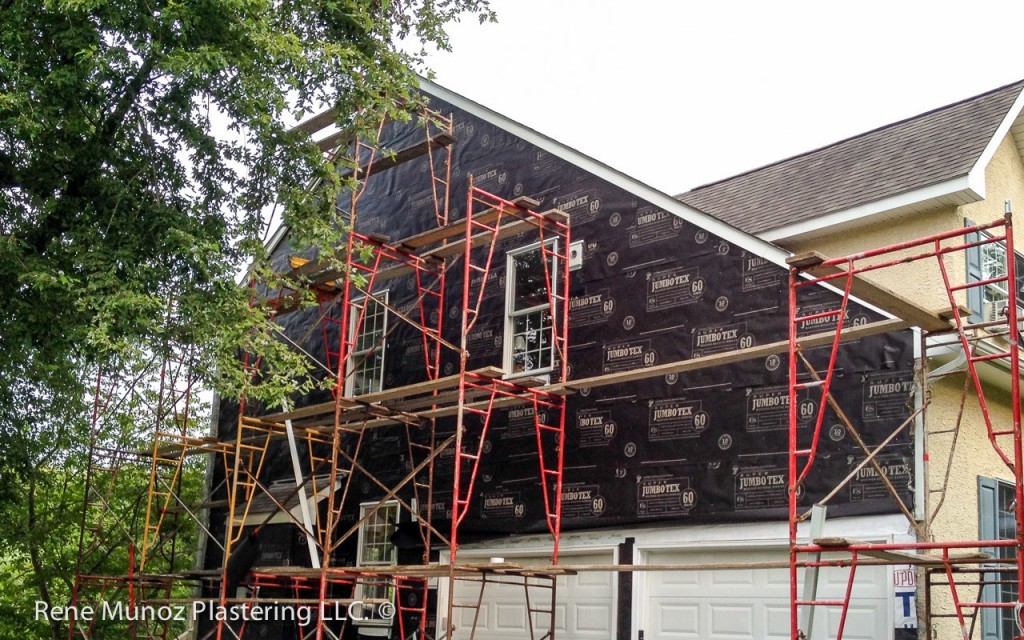
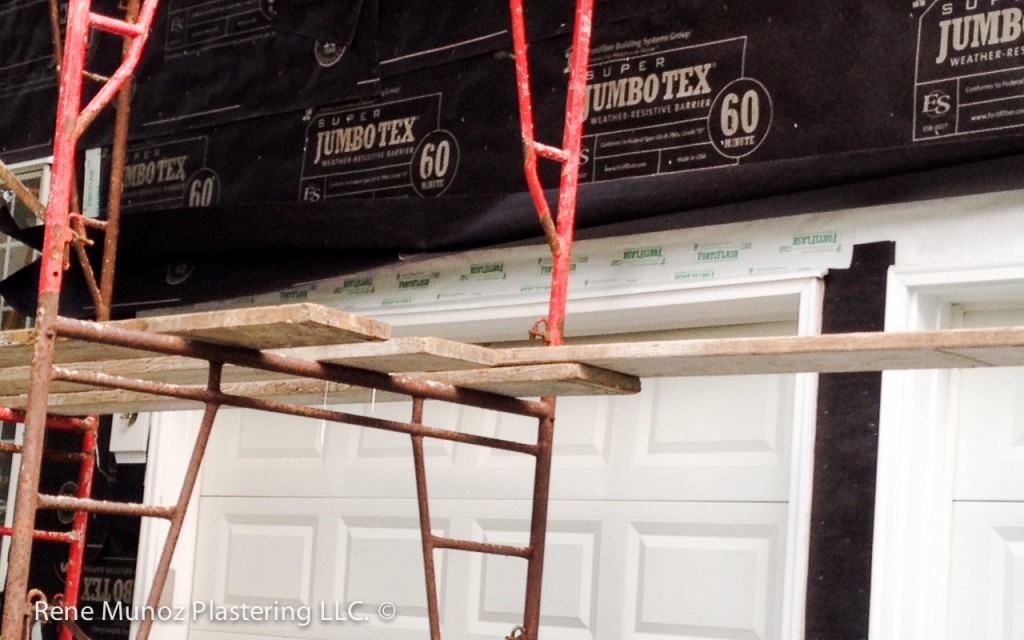
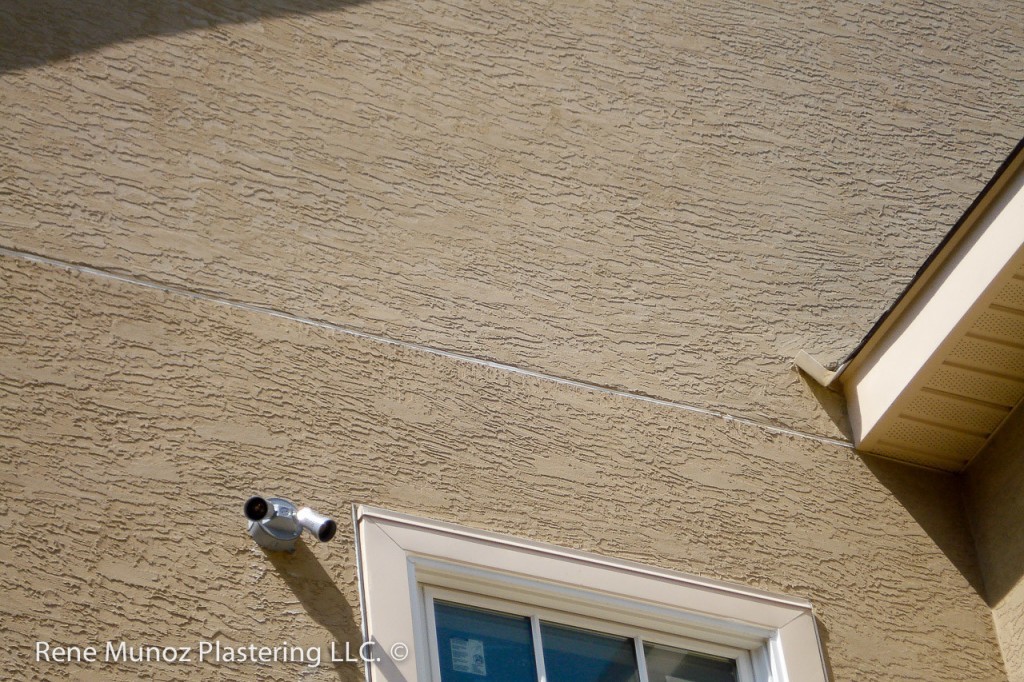
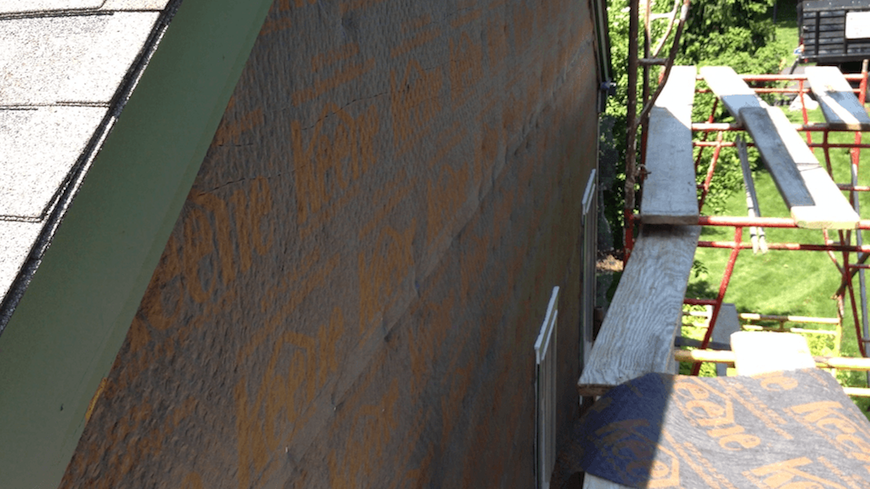
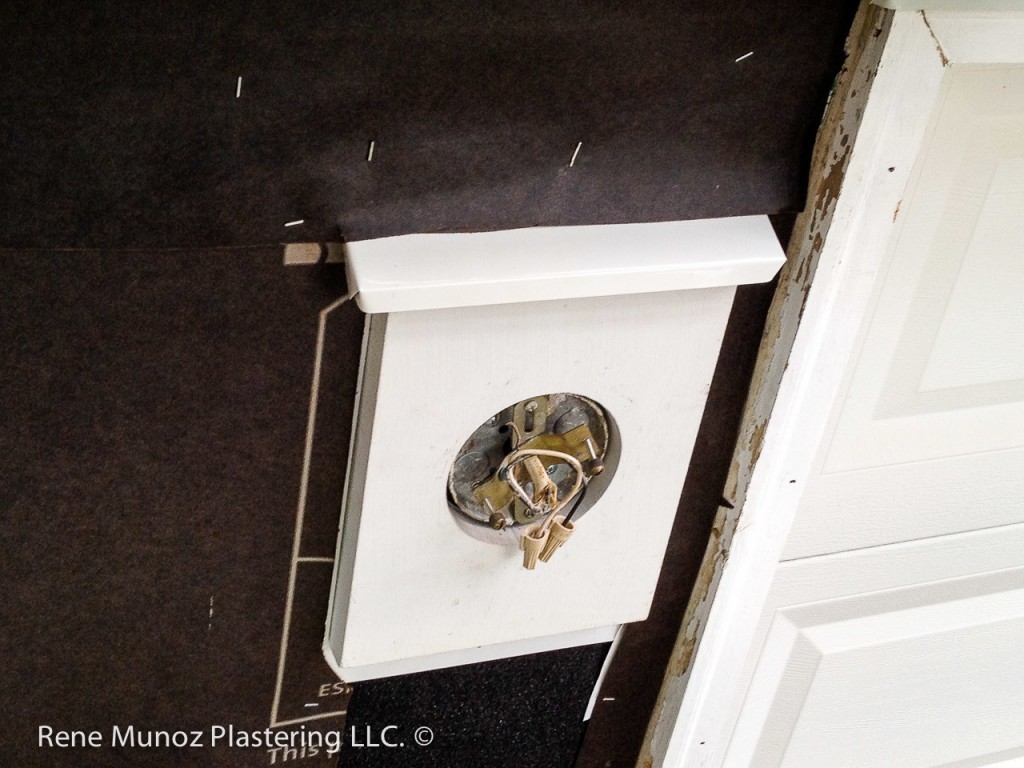
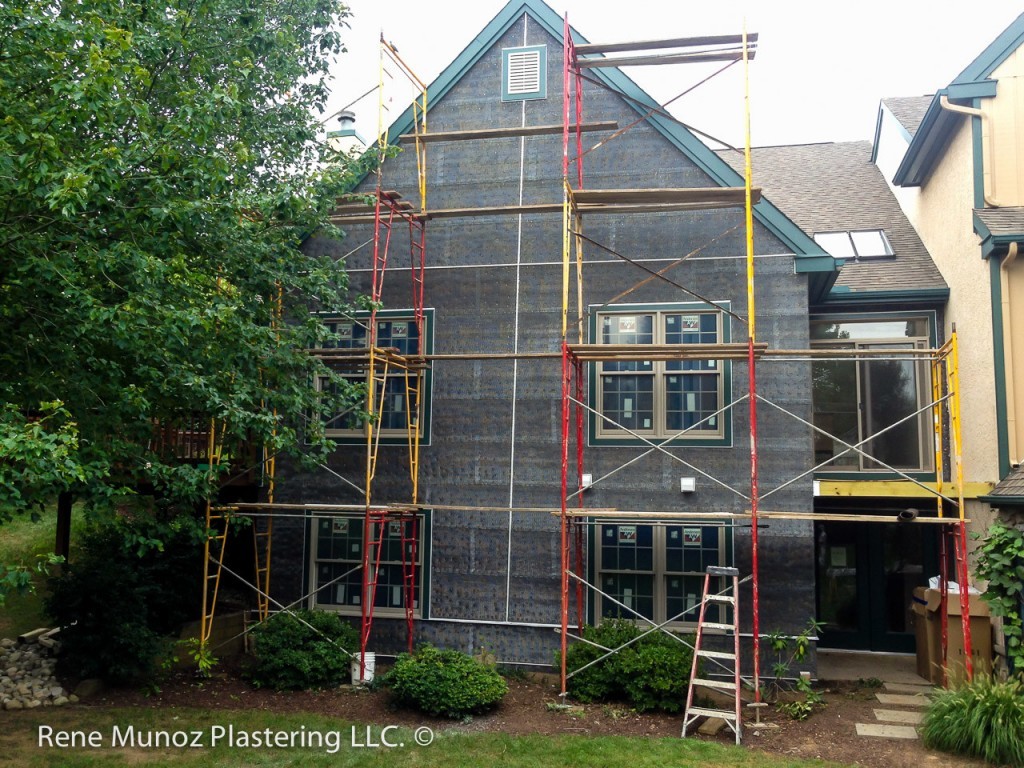
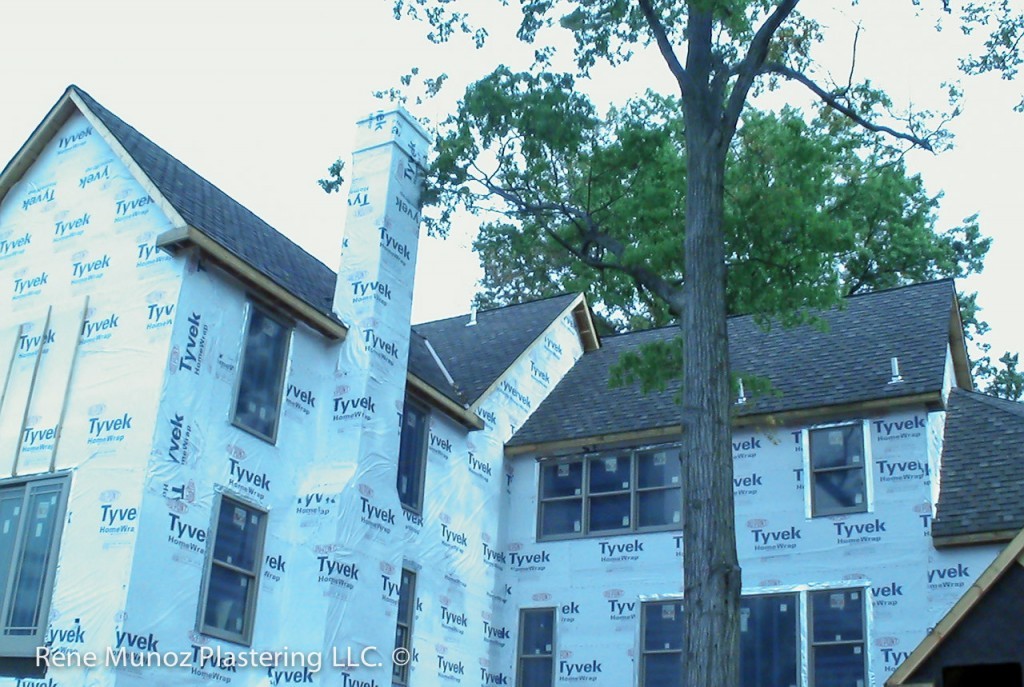
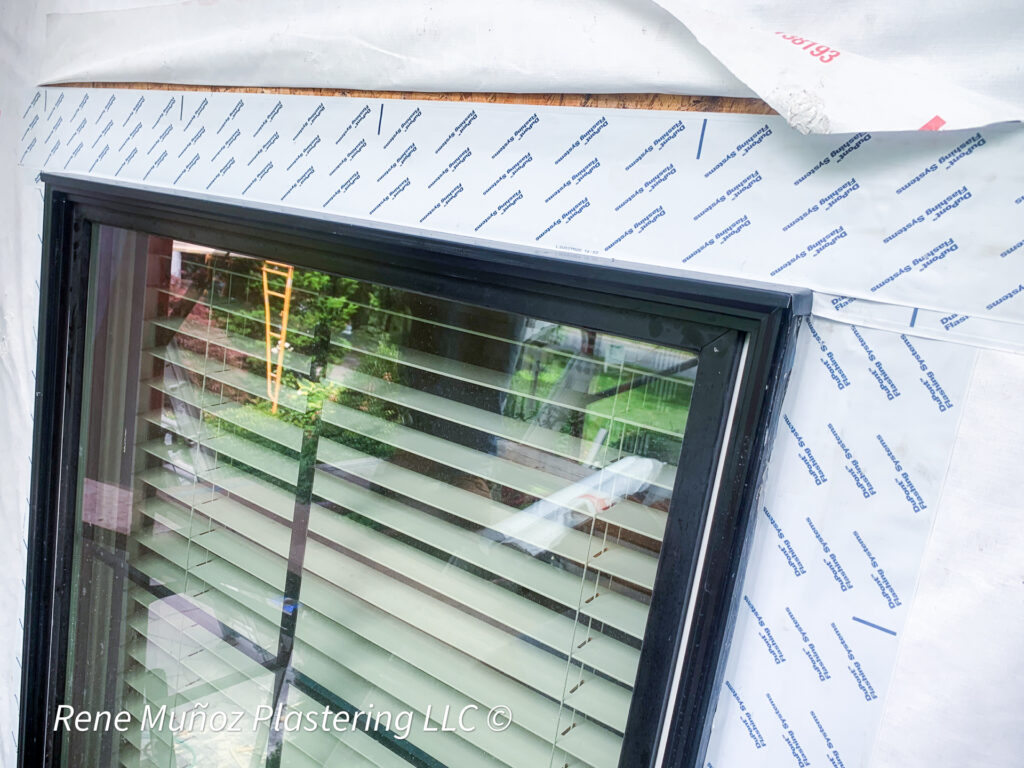
A grade D construction paper should be  installed in a shingle way mode starting  from  bottom  to  top  with  an overlap not smaller  than 6” (vertical & horizontal), Water resistant  barrier should be installed  over the  weep screed’s nailing flange, at every widow  it ALWAYS  should be installed  under/behind the previously installed window sill’s flex wrap. For best results  a double layer  of a grade D paper or a water resistant barrier such the Super Jumbo Tex® 60 min is ALWAYS recommended  to provide the structure with the best  protection and waterproofing.

5.-WEEP SCREED

As part of an stucco drainage system,  weep screed  should be  installed  at  the bottom of  all  framed walls where  wood meets the basement’s concrete (plate line and rim joist),  weep screed has been designed to allow moisture and water  to migrate down, out and shed away from the wall through its holes (weep holes),  weep screed should also be installed  a minimum of 1 1/2″  above any roof line  to allow  the upper walls to properly drain, as a pro contractor Rene Munoz Plastering always recommend  the joint between  frame and concrete to be seal prior to install the weep screed.

6.-DRIP CAP FLASHING

Pre bent aluminum coated  or vinyl  drip cap flashing should be installed over the head casing of all windows and doors 3/8″ larger than the window or door  where is been installed  this gap will later  accommodate  the EZ Bead  or  regular J channel. As  a pro  company  Rene  Munoz Plastering  recommends an extra  layer  of flashing tape over the drip  cap prior to install a  water resistant barrier to seal  all windows and  doors   properly.

7.-EZ BEAD OR  REGULAR J CHANNEL

To avoid risk of moisture, water penetration and  help with expansion and contraction,  EZ Bead or regular J channel should be installed  to create a gap for caulking wherever stucco  meets another dissimilar material such Azek PVC trims, windows, doors, stone, siding etc,etc…

*Note* When  regular J channel  is used, foam backer rod is required to be installed prior to caulk.

8.-CONTROL EXPANSION  JOINTS

control expansion joint is an assembly designed to safely absorb the contraction and  vibration of Portland cement plaster (stucco). The proper use of expansion in stucco systems will depend on a number of variables, including: the type of construction, materials to which the stucco will be applied, orientation of the construction vertical (walls) or horizontal (ceilings).

9.-KICK OUT FLASHING DIVERTER

As the name suggest kick outs are designed  to kick  and divert the water away from the stucco wall into the gutter. This molded one piece  of plastic or welded one piece  of metal  most be installed where a vertical wall meets  the end of  a roof  near the fascia board where the gutter later will be installed. This is a critical location where water entry can do considerable damage, Kick out flashing diverters  should be fabricated with watertight seems and most  be big and broad enough to handle water run-off from a variety of roof pitches. Kick-out flashings should be installed under shingles and behind the existing roof flashing to prevent water from running down the stucco wall. See our  latest  blog post  eight reason why stucco fail  to find out the damages caused by missing kick-out flashing diverters.

10.-RAINSCREEN MAT

A rainscreen protects the water-resistant barrier from get in contact with cement and creates a gap between the barrier and exterior cladding. The 3D entangled net mat allows water to drain, dries faster, and promotes efficient air flow, preventing wood decay and deterioration. Check out our blog post on this material.

Rainscreen drainage mat to help with moisture problems.

11.-LIGHT FIXTURES, ELECTRIC OUTLETS

Waterproofing a structure involves critical elements like flashings.

Stucco failures often occur due to missing flashings, such as Z flashings for deck ledger boards, drip caps above windows, L flashings over stone sills, and kick-out diverters.

In designing a waterproof system, we carefully address light fixtures, ventilation pipes, spigots, and all openings, treating them as windows to ensure proper waterproofing and effective water management.


12.-METAL LATH

In eastern PA the most common laths available are the galvanized diamond metal lath mesh (big box stores)  and the galvanized self-furring dimple diamond metal lath mesh (specialized stucco suppliers only, more expensive),
The big difference between this two materials  is the space they create between the surface to be plastered.

To explain it in a simple way  the diamond metal lath mesh, seats FLAT on the wood structure when is installed leaving no gap  for cement to rest.

As for the  self furring dimple diamond mesh (we call it bubble  wire). The self-furring dimples (bubbles) hold the metal lath 1/4” away from the surface to be plastered. The dimpled raised lath substrate provides a superior mechanical bond over wood, block or concrete, this is why  self furring dimple  diamond mesh is our metal lath of choice when performing  any  vertical plastering work.

Each project is unique, and while stucco is a great cladding, it’s the waterproofing and water management behind it that truly protects your investment. That’s where we excel and differentiate ourselves.

Stucco and stone repairs can be complex, professional skill and experience are essential for successful repairs.
If you need a professional contractor or are facing stucco, siding, or stone issues, feel free to contact us. We’re here to answer your questions and help resolve any moisture problems.

Our Quality Work

Professional 3 Coat Stucco Installations

Stucco contractor, commercial specialist in West Chester, Chadds Ford, PA 19317-4
custom stucco pillars corridor, contractor, professional, installer in Villanova, Media PA -8
residential stucco and stone contractor, professional in Conshohocken PA 19428-9
Stucco-remediation-at-coatesville-PA-19320-3.webp
residential stucco and stone contractor, professional in Oxford PA 19363-2
3 coat commercial acrylic stucco, west chester PA-12
stucco and veneer stone contractor in Collegeville PA -3
custom stucco pillars corridor, contractor, professional, installer in Villanova, Media PA -14
residential stucco and stone contractor, professional in Conshohocken PA 19428-11
Stucco pool house and pillars
commercial stucco and stone contractor, professional in Adubon PA 19403-7
residential stucco and stone contractor, professional in Conshohocken PA 19428-8
Stucco remediation, contractor, specialist in Walingford PA19086-1
stucco and veneer stone contractor in Collegeville PA -4
Acrylic residential stucco contractor, professional in Conshohocken PA 19428-4
Stucco remediation to siding at West Goshen-13

Get in Touch with Us

Book a consultation

WE ENHANCE YOUR INVESTMENT WITH BEAUTY AND VALUE

“QUALITY MEANS DOING IT RIGHT WHEN NO ONE IS LOOKING”

–– Henry Ford ––

GET A QUOTE

Edit Template

Stay connected

Contact Us

Recent Projects

  • All
  • Portfolio
Stucco Remediation Specialist in West Chester, PA 19382
Stucco Remediation & Repair in Coatesville, PA 19320
EIFS Stucco Installation & Remediation in Telford, PA 18969
Stucco Remediation to Hardie Siding in East Goshen, PA 19380
Stucco & James Hardie Siding Installation in Wayne, PA 19080
Professional Stucco & Stone Contractor in Dresher, PA 19025