Blog

Avoid stucco, siding & stone problems, new construction window installation.
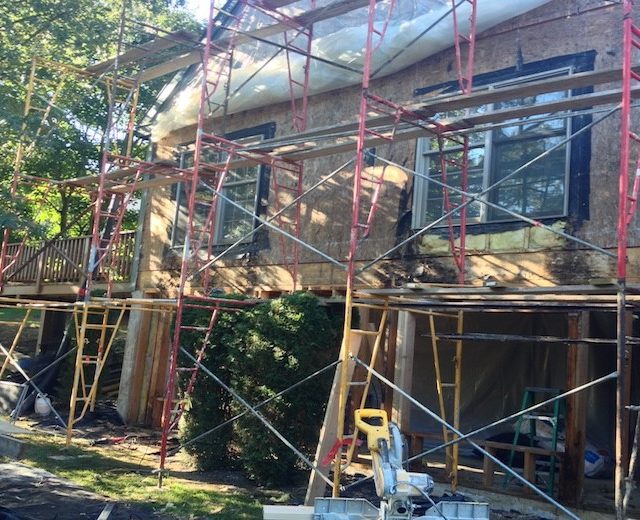
We often perform stucco removals due to water and moisture damage, in this post I would like to take some time to show you how we perform new construction window installation.
How to Install new construction windows properly by Rene Munoz Plastering LLC.
We’ve already talked about the eight reasons why stucco and stone fail and we’ve already mention that the main reason why stucco, siding and stone installations fail is because a wrong window installation. We recently had the opportunity to do an stone front located at NY, when we arrived to the site job, the first thing we did was to check the installation of the windows, we normally do this because we know that no matter how good our waterproofing system is, no matter if in this case the builder of this particular building is using the Zip system as their sheathing system of choice, we still need to make sure that the windows are properly installed, this will guaranty that the entire system will work as it should from inside to outside.
Wrong window installation is the main reason why stucco, stone and siding fail.
Never underestimate the sneaky damage power of water and moisture in a wooden structure, in this particular case we choose to go with what is called a partial adhered new construction window installation. We hope that this video series will give you a better understanding on how to install a window, the materials we use and why.
How to install a flanged (new construction window) part I

List of materials you will need to perform this task.
- If you would like to add an extra layer of water protection to the system I will suggest you to go with Fortifiber’s Super Jumbo Tex as your second layer of water protection.
- DuPont Tyvek home wrap as your first layer of water protection.
- DuPont Tyvek sheathing tape to seal all the joints between the paper.
- DuPont 9″ FlexWrap to create a sill pan for the window, this tape is very important since is the one that will seal the lower corners and protects the window sill. We have chosen the 9″ because of the protection, the bigger the tape the better at wrapping both the window sill (framing) and the paper.
- DuPont 4″ flashing tape to install over the window flanges. ( remember, this tape goes on the left, right and top)
- Drip cap flashing (Z flashing) this will be installed over the window head casing.
- OSI Quad max Sealant to seal the joint between the window flange and the structure
- OSI Quad foam window and door foam sealant to air and water seal the joint between the window side jamb (framing) and the window.
- 1/8″ horse shoe shims to create a gap/space between the window and the window sill (framing).
- 3/8″ staples to fasten the water resistant barrier ( paper) to the wood sheathing.
- 2″ Electro-galvanized roofing nail to nail the windows in place.
List of tools you will need to perform this task.
- Stapler ( hammer tacker) to install the water resistant barrier ( building paper).
- Utility knife to cut the paper, the sheathing tape and the self adhesive membrane.
- Hammer to clean the window rough opening if necessary and to nail the window in place.
- Metal lath straight cut aluminum snips to cut the drip cap flashing.
- Level to assure that the window is been installed plum and level.
- Rubber roller to make sure that the self adhesive tape will stick to either the substrate,window flange and paper, see if you can find a 4″.
We always are looking to improve , pls let us know if you have any questions or suggestions.
Good luck with your project!!
Related posts